In the previous parts of our series called First steps with Synology, we talked about what a NAS actually is. Next, we looked at how to transfer data to a Synology device, and in the last part we described how to manage and use the Download Station application. If you are interested in any of these topics, be sure to click on one of the relevant links below. In today's episode, we will look at something that will be useful for all users of the macOS operating system.
I personally did not use Time Machine backup on my Mac. This is partly because I didn't have a drive to back up to, and partly because I found it impractical to plug in an external drive every time for a backup. However, that changed with the acquisition of Synology NAS. Since the Synology is constantly connected to the network together with the hard drive, all these "troubles" disappear. So all you need to do to start backup on Synology is to set everything up correctly. So in today's article, we will look together at how to back up your Mac or MacBook on Synology using the Time Machine service in macOS. There is no time to waste, so let's get straight to the point.
Create a shared folder
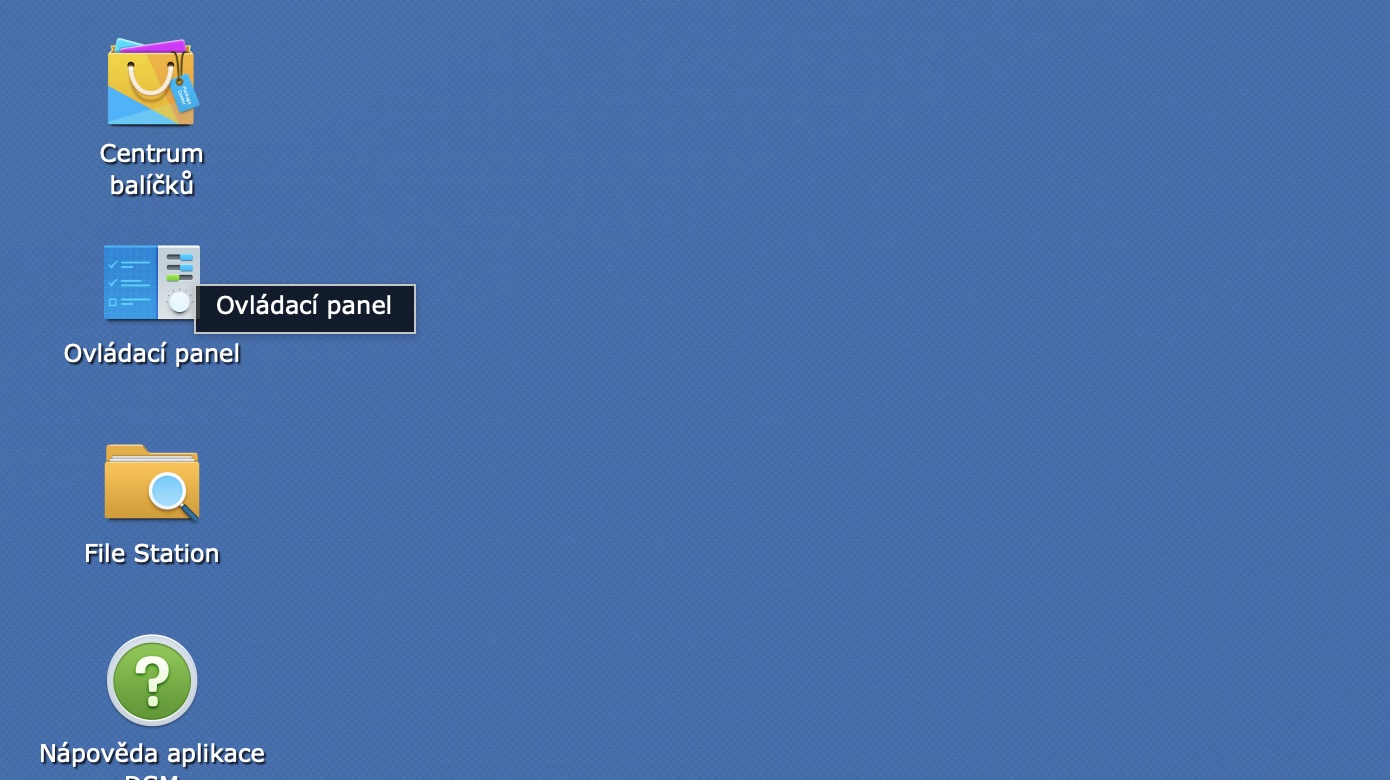
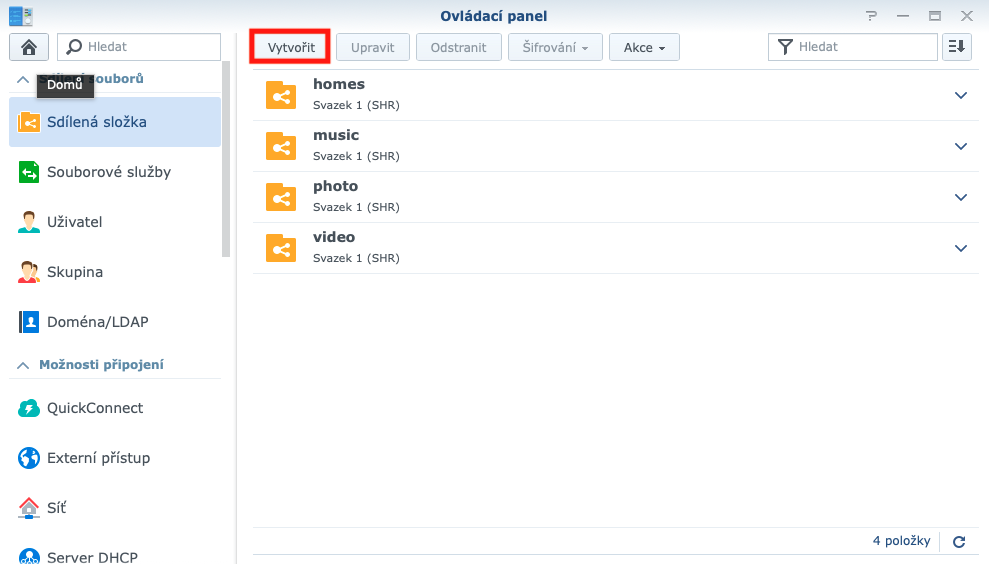
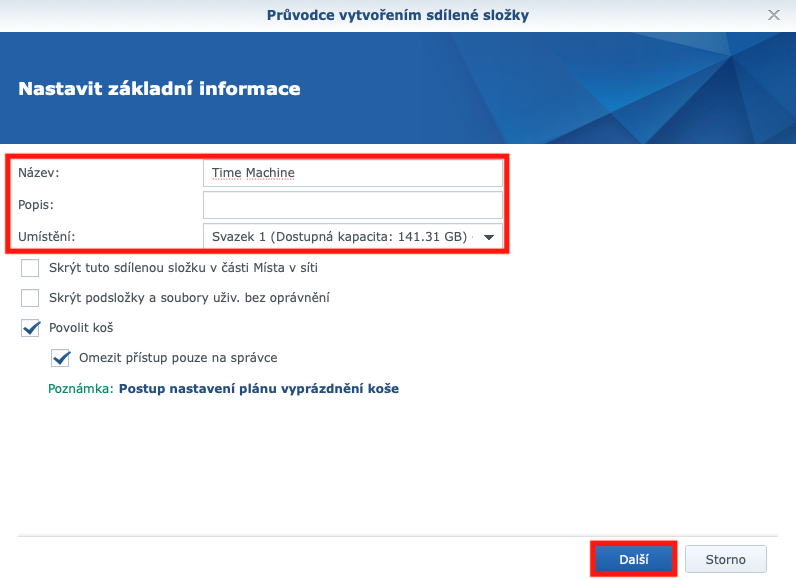
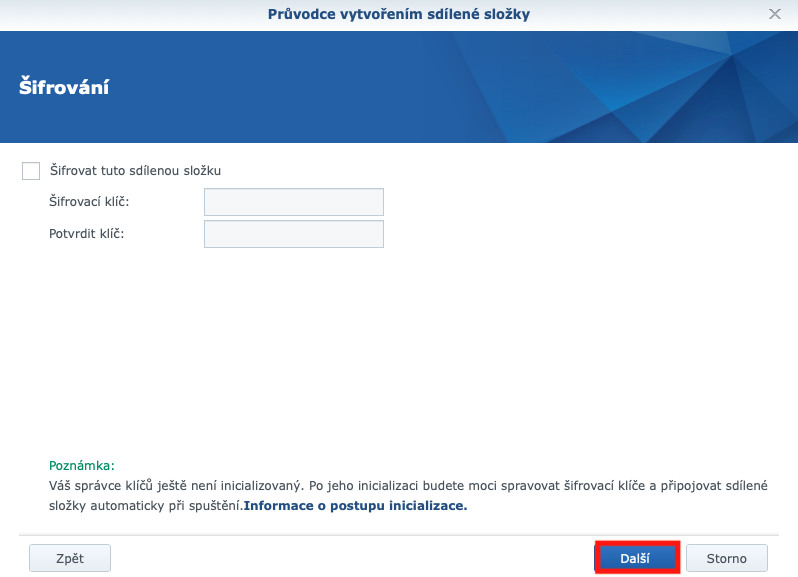
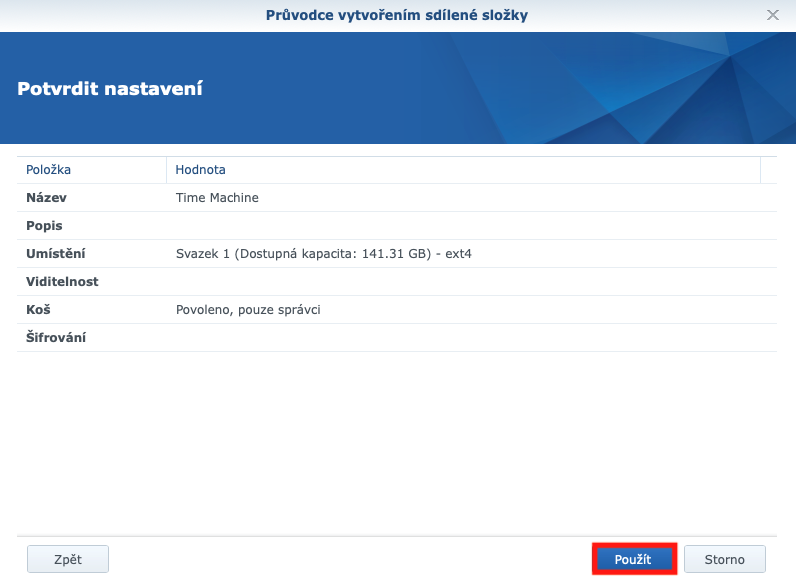
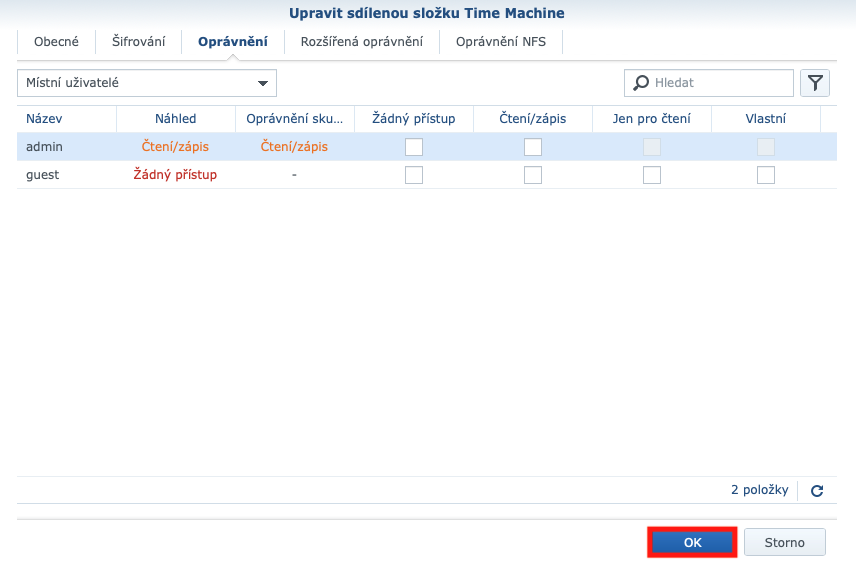
First, you need to create a special one on your Synology drive shared folder, where your Time Machine backup will be stored. So open the DSM system and log in under administrator account. Then click on the application on the left Control panel and click on the first option - A shared folder. Then click the button here Create. Then choose basic informace about the shared folder. As name for example, use "time Machine" and if you have multiple drives installed in your Synology, then in the menu Location choose on which of them the folder should be created. Leave the checkboxes below in the original setting. Now click the button Další. If you want to encrypt the shared folder, check the box Encrypt this shared folder and set your encryption key. Of course, you need to remember the encryption key for decryption - if you forget it, you'll simply lose your data. In the end, you just overview check that you have everything set up correctly. If everything fits, click the button Use. Otherwise, you can still use the Back button to go back and change what you need. After confirmation, you can still select other preferences - in my case, however, I did not change anything and pressed the button OK.
Creating a special user
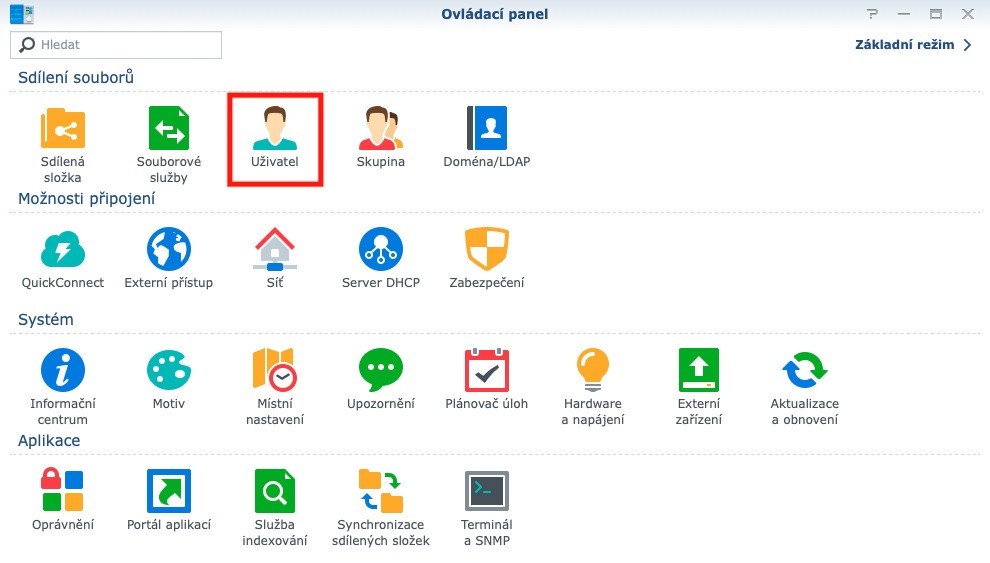
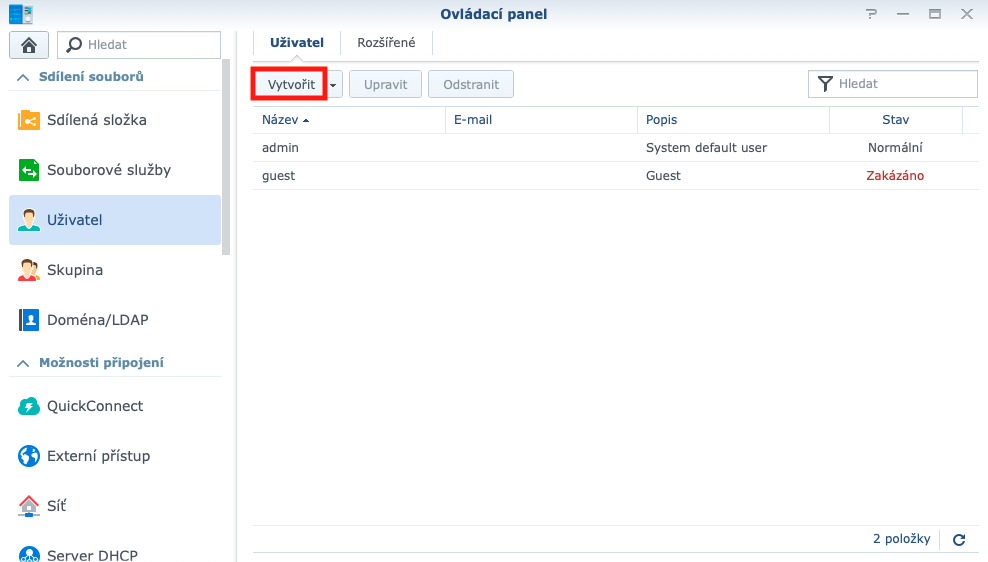
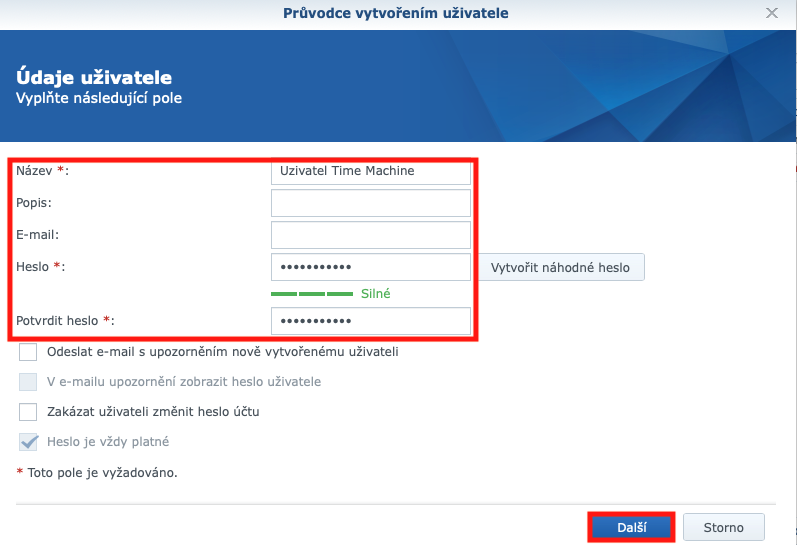
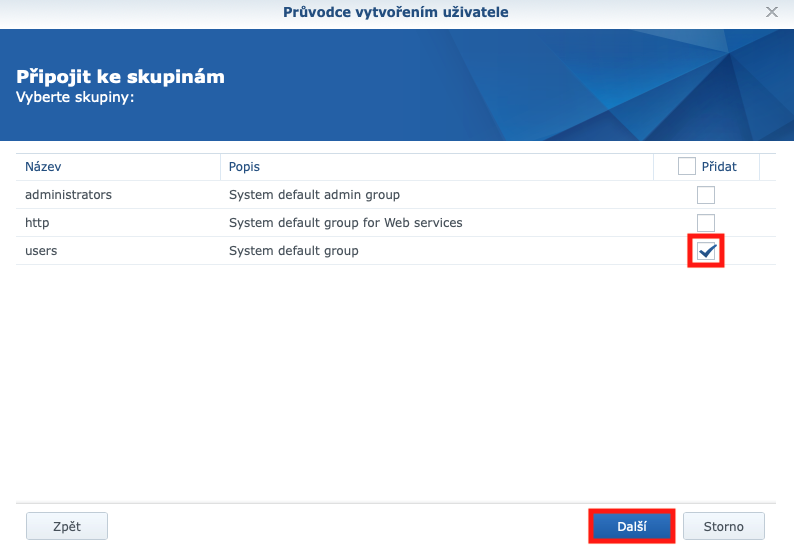
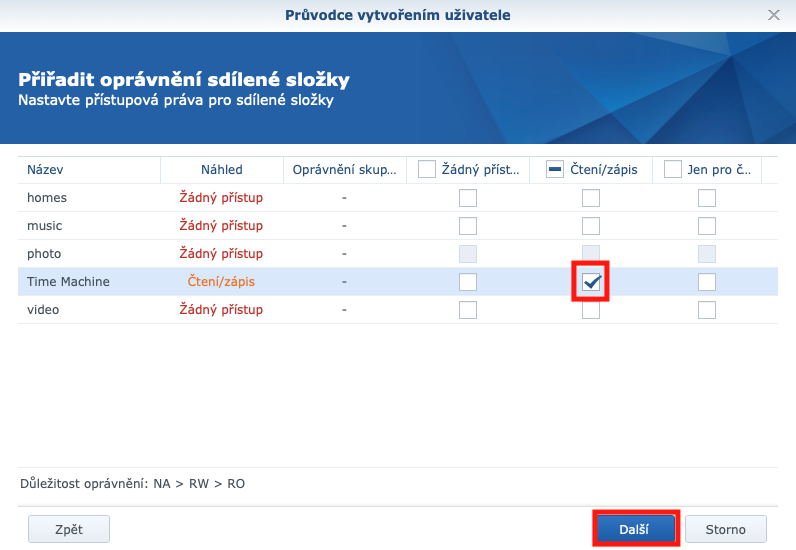
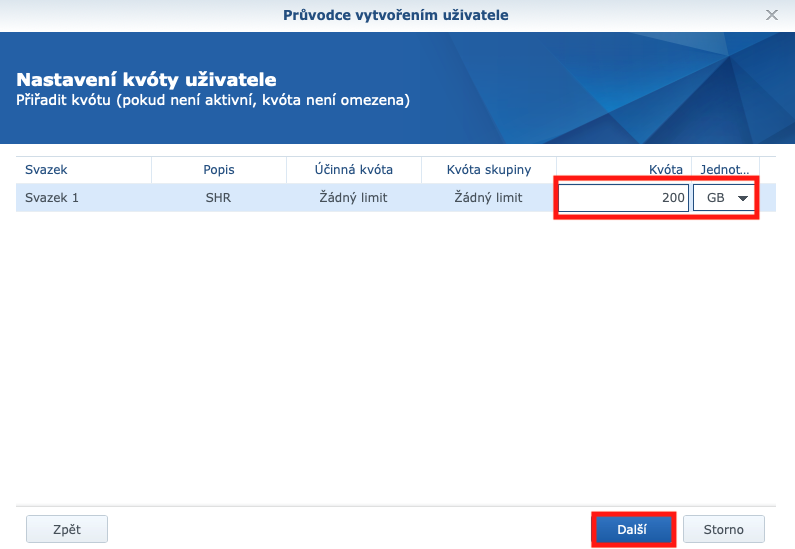
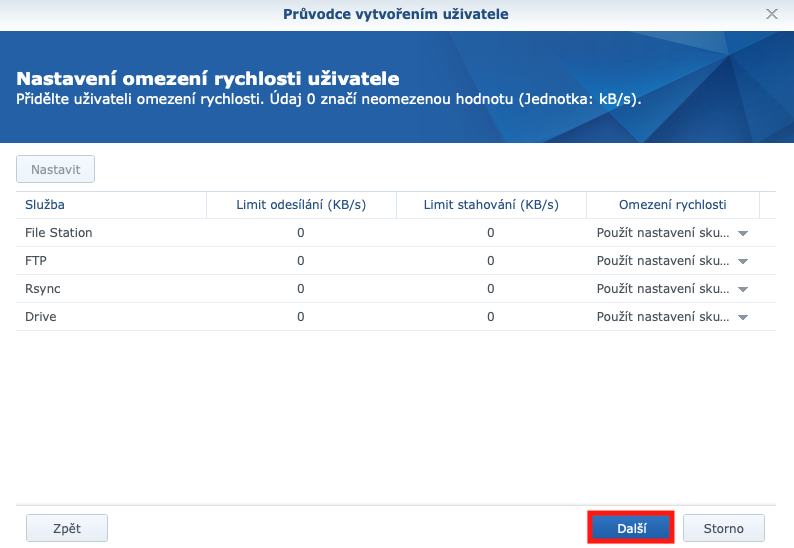
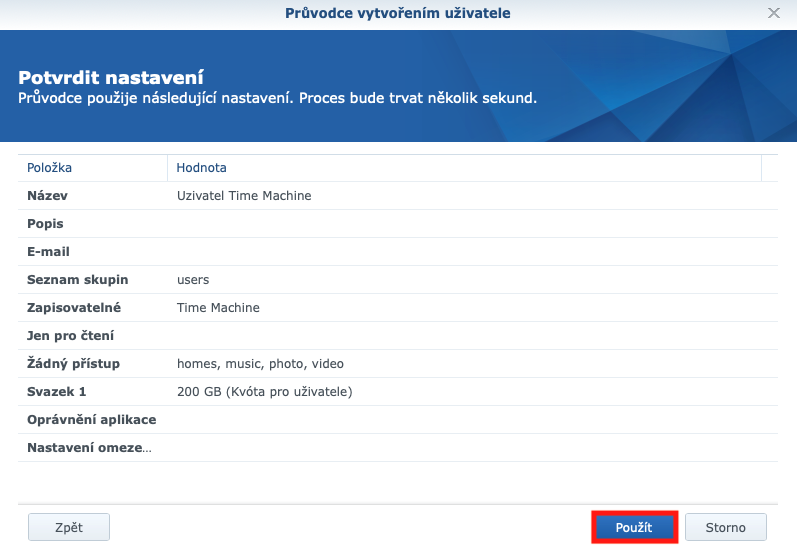
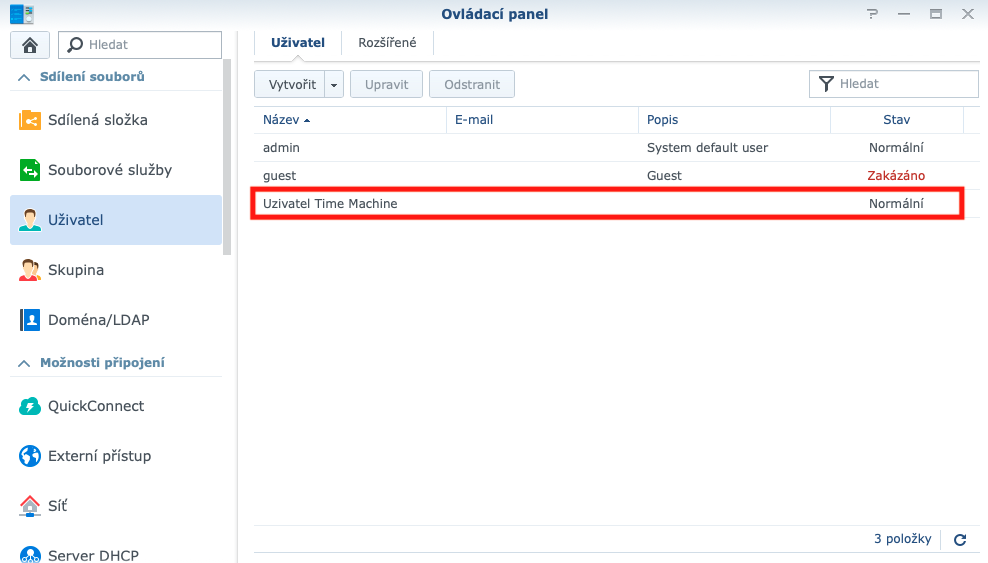
After you have successfully created a shared folder, you need to create a special user, which you will later use to log in to Time Machine. So open the app again Control panel and click the section User. Click the button at the top Create. Choose a username for example “Time Machine user” and don't forget to enter as well password. Then click the button Další. On the next screen, make sure that in the line “users" pipe, and then click the button again Další. If you have changed the rights for the "users" user in the settings, it is necessary that this new user has the option reading and writing. In the next step, it is necessary for you to create a folder time Machine checked the option Read/Write. You can choose in the next setting quota size, which you want to assign to Time Machine. Here, it depends on how big your hard drive is in your Synology - also set the quota you allocate to Time Machine accordingly. Of course, keep in mind that the quota size should be at least 2x bigger, than the drive on your Mac. There is no need to set anything in other windows. So click the button twice Další, and then click on Use.
Additional settings in the DSM system
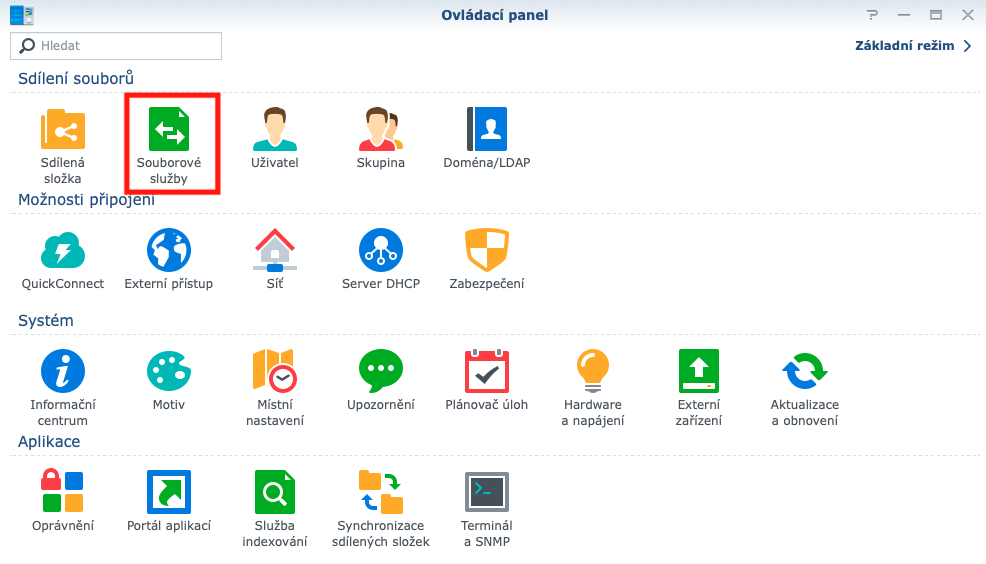
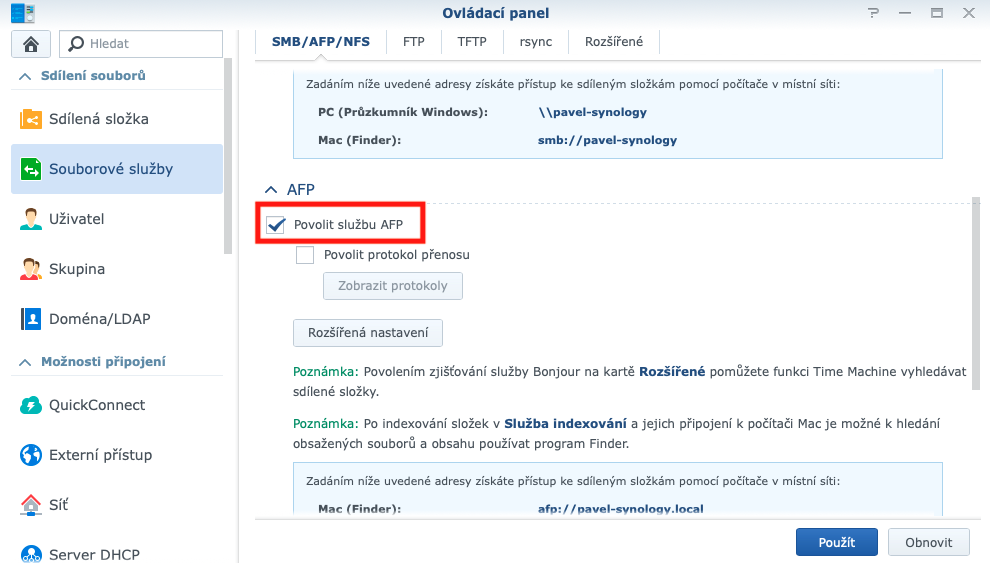
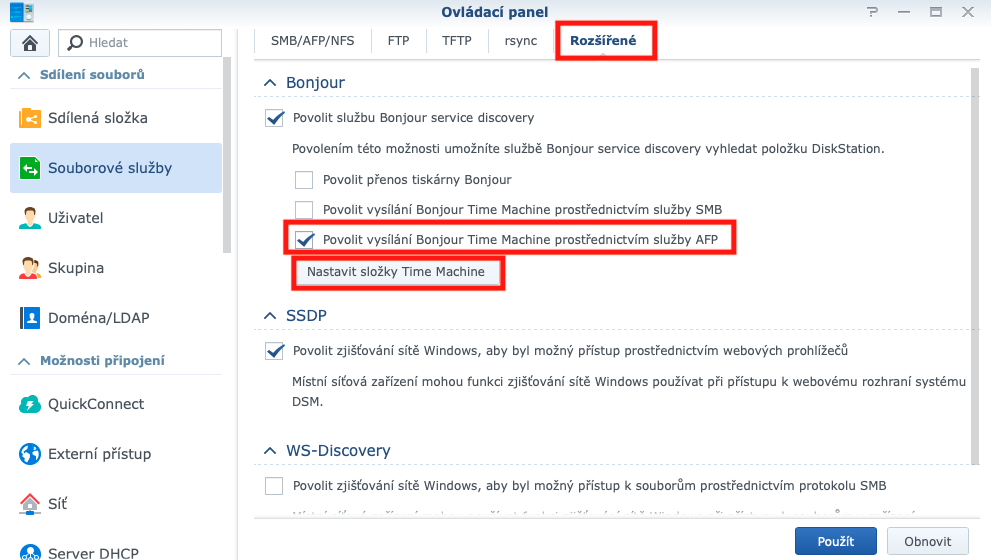
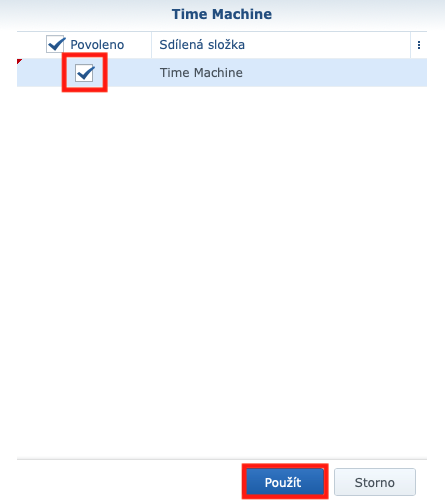
Once we have created a folder and a user, it is only necessary to set up additional services in the DSM system. So open up Control panel and click the tab File Services. Here, make sure you are in the top menu section SMB/AFP/NFS and at the same time check that you have activated AFP service. Then move to the section in the top menu Expanded and check the option Enable Bonjour Time Machine broadcasts via AFP. Then click the button below Set up Time Machine folders and check the named folder time Machine, which we created. Then click on Use. That's all from DSM, now it's Mac's turn.
Connecting to Synology
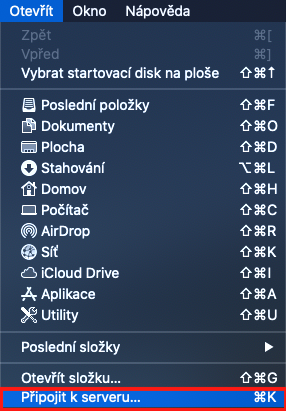
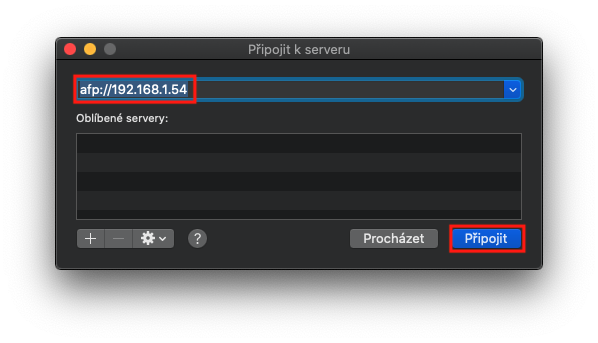
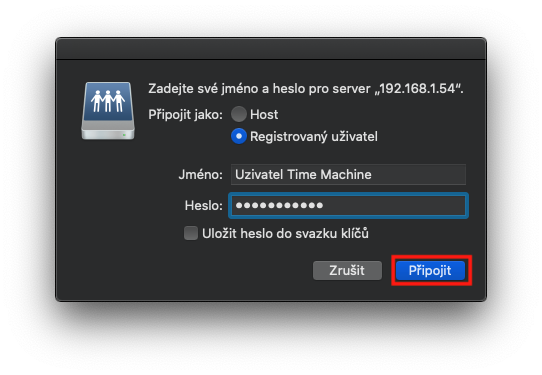
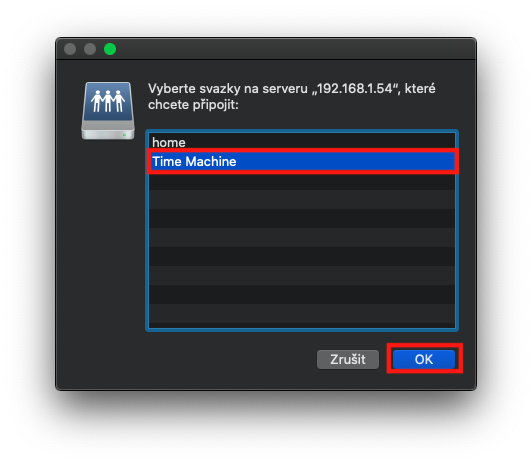
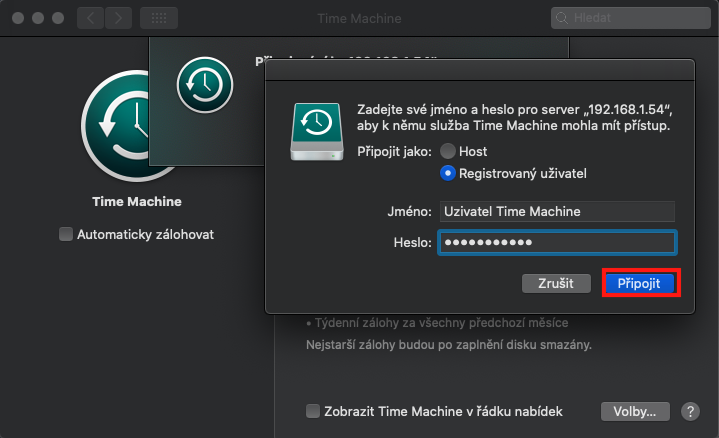
Now we need to tell our macOS device where the folder to be backed up with Time Machine is located. So move to active Finder window and click the option in the top bar Open. Then select an option from the drop-down menu Connect to server. Using the protocol AFP connect to your Synology device. The address will be in the format afp://192.168.xx. Then click the button Connect. A new window will appear requiring you to log in to Synology with user, which you created in one of the previous steps. Check the option at the top Connect as a Registered User, choose as the name Time Machine user and enter password. Then click on Connect. In the next window, click on the named folder time Machine and confirm the selection with the button OK. The folder is successfully mounted, now all you have to do is set up Time Machine.
Time Machine settings
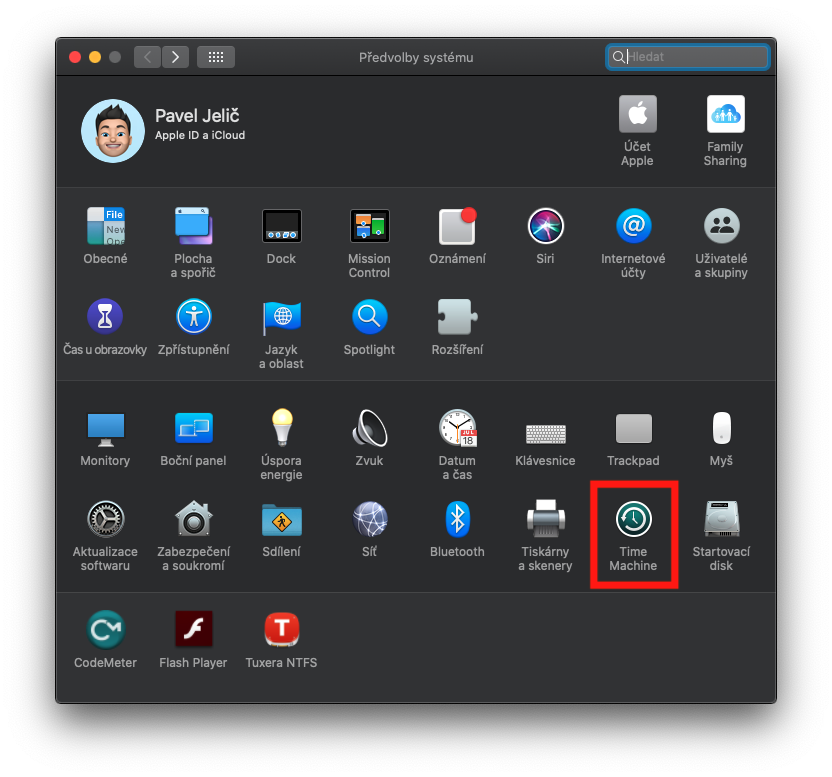
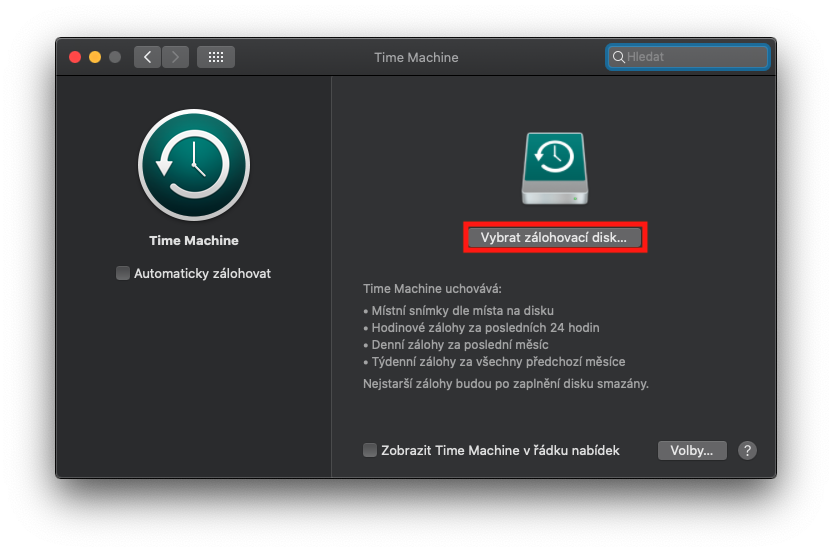
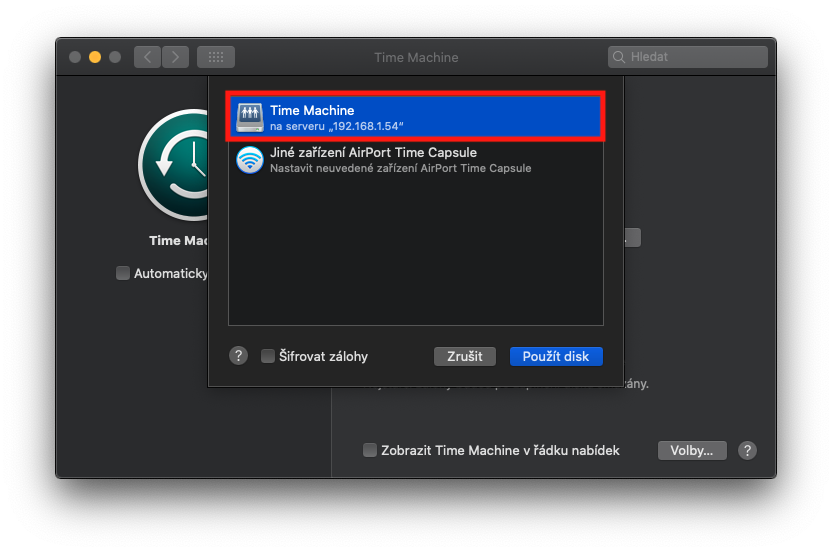
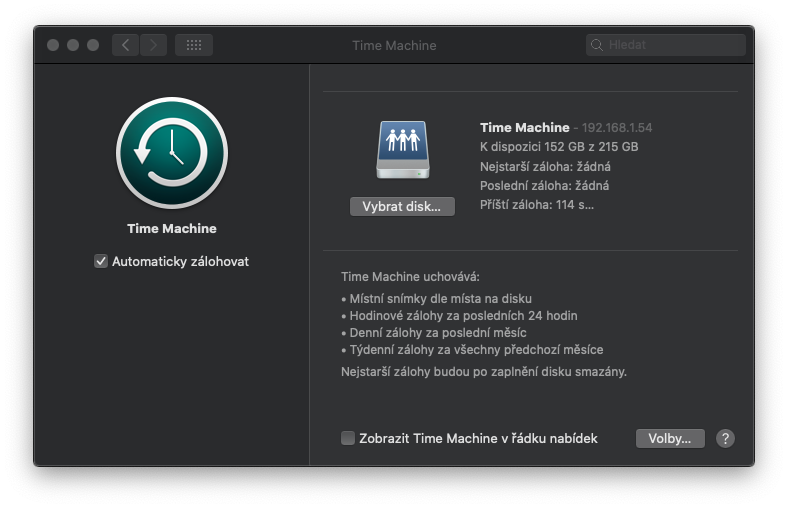
On your macOS device, open the app time Machine – in the upper left corner of the screen, click on icon Apple login and select an option System Preferences… In the new window that appears, click on the section time Machine. Then click the button Select a backup disk… and select the shared folder from the menu that appears time Machine and click on Use disk. Then log in again as in the previous step using special user. That's the whole process, now you just have to wait for the initial backup to start.
záver
Even though this is a rather complicated guide, I think it's really worth the effort. If you ever lose your device, you are always sure that you will not lose any data. I personally didn't use Time Machine until I almost lost all my data once. One day I woke up and wanted to turn on my MacBook, but unfortunately I couldn't and the device went to claim. I prayed every day that I wouldn't lose the data on my drive and vowed to start backing up immediately when I got my Mac back. Fortunately, I didn't lose any data, but I immediately started backing up with Time Machine just to be sure.
